There might arise the occasion where you hit a roadblock when trying to install the Imagick PHP extension on Windows. When all is done there are times when even though there was no error reported, this extension does not work as expected.
The Imagick PHP extension allows developers to use the features of the ImageMagick, the suite for displaying, converting, and editing raster image and vector image files directly in your PHP code.
Before you install this graphics extension you need to know what PHP version you are currently using by running the following commands in CMD or Powershell terminal.
Type this to determine the PHP version:
php -i|find "PHP Version"Next, you need to determine the thread-safety, where, ‘enabled‘ means you are using a thread-safe version and ‘disabled‘ means you are using a non-thread-safe version:
php -i|find "Thread Safety"Finally, you need to determine the architecture, where, x86 means you are using the 32bits version and x64 for the 64bit version:
php -i|find "Architecture"Once you are armed with the above information, it’s time to go to the PECL website to get the official Imagick PHP extension download file.
Visit this release page and navigate to the latest version (currently 3.4.4).
Note: If you are using PHP versions earlier than 7.0 you have no option but to download version 3.4.3.
Whichever version number you go with you’ve got to download the right file. The file name will give you a hint as to which file you need to download for your particular setup.
The file name is in the following format. Take for instance this file name php_imagick-3.4.4-7.3-ts-vc15-x64.zip. This is how it is broken down:
- php_imagick: extension name
- 3.4.4: file version number
- 7.3: PHP version number
- ts: thread-safe. (nts means non-thread-safe)
- vc15: Visual Studio compiler version
- x64: 64bit architecture (x86 would mean 32bit architecture)
- .zip
1. Download the appropriate files to your computer and extract the zip file.
2. Copy the php_imagick.dll file into the ext directory in your PHP installation directory (where you have php.exe).
3. Either copy all the CORE_RL*.dll and IM_MOD_RL*.dll files into the PHP installation directory (where you have php.exe) or add them to a directory in your preferred location. If you choose the latter make sure you add that directory to your system environment PATH variable.
4. Open your php.ini file, usually in the same directory where you have php.exe, and add the following line.
extension=php_imagick.dll5. Restart the Apache/NGINX Windows service (whichever you have running).
Run the following code in a PHP file. And you should see the result as illustrated below.
<?php echo phpinfo(); ?>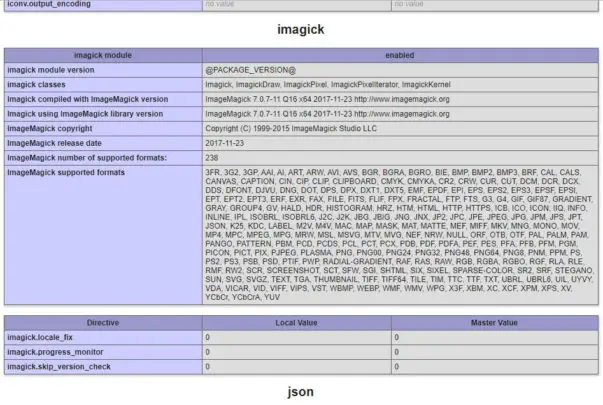
That’s how you properly install the Imagick PHP extension on Windows.
Found this article interesting? Follow Brightwhiz on Facebook, Twitter, and YouTube to read and watch more content we post.