Have you ever wanted to automatically display standard content after each post or page in WordPress? Then you have come to the right tutorial. Here we will be showing you three general ways to automatically add content after posts or pages in your WordPress site.
Some of the use cases for adding content after each post could be situations where you might want to add disclosures, signatures, custom ads, call to action, an email opt-in form, a set of links for your readers to follow, and more. WordPress does not come with a native method to automatically add content after posts or pages so we will have to use other WordPress features to accomplish this.
The first method will involve using a plugin and generally ideal for site admins who have no experience with WordPress theme development. The second method will use a WordPress filter and is more ideal for those who are not shy of delving into theme development.
Automatically Add Content After Posts in WordPress Using Plugin
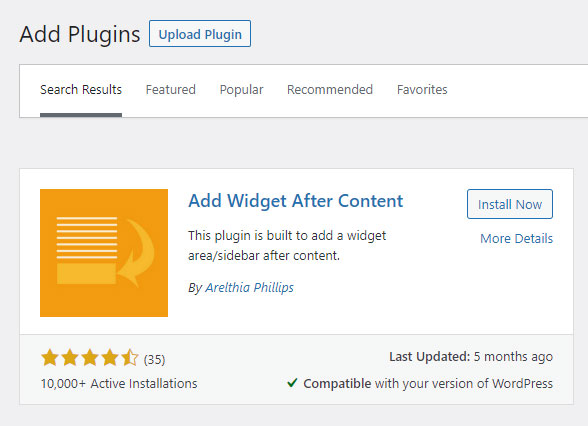
The featured WordPress plugin that you can use for automatically adding content after posts is the ‘Add Widget After Content‘ plugin by Arelthia Phillips. It comes available free of charge in the WordPress plugin directory.
To get started, sign in to your site’s admin area and then navigate to Plugins > Add New using the sidebar menu.
From the Add Plugins screen, Search for ‘Add Widget After Content‘.

From the results install and activate the plugin using the WordPress on-screen tools.
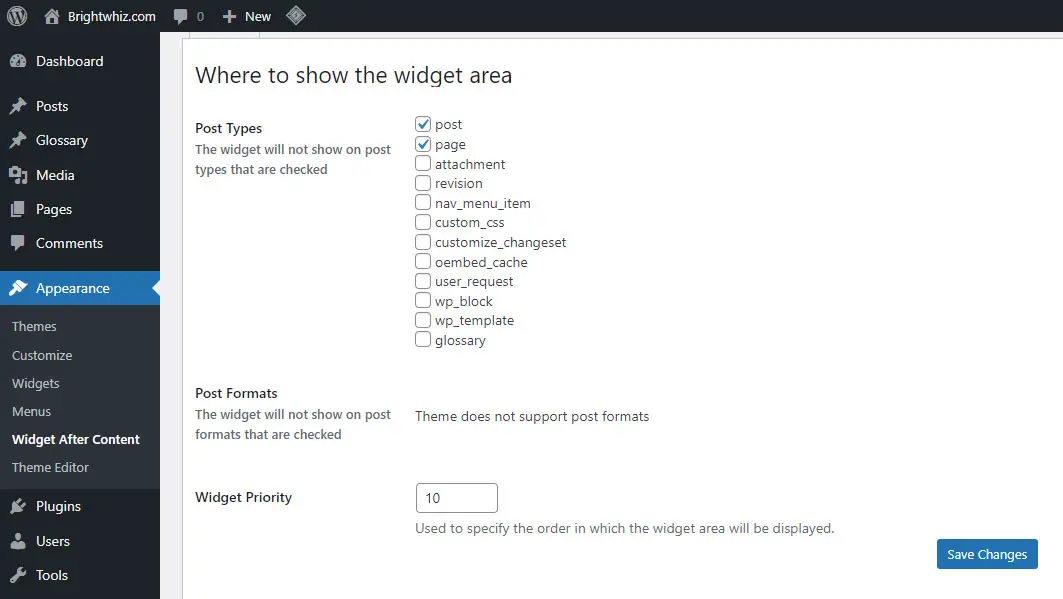
Once you have successfully completed the above steps it can then be configured from the settings screen on the Appearance menu.
By default, the widget will display on all posts but using the configuration options you can choose where you would like the widget to appear or not.

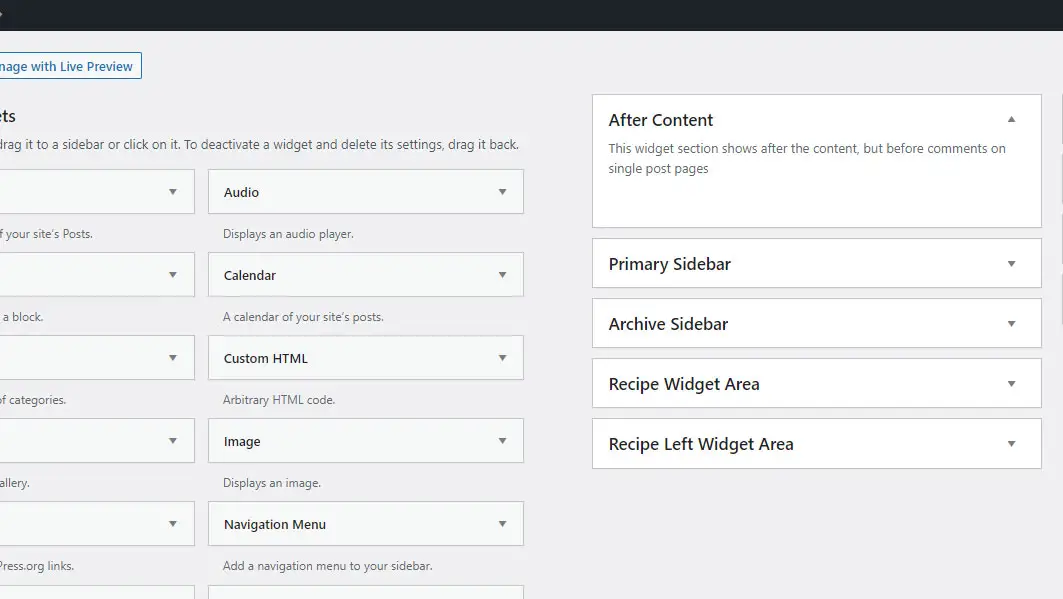
Once that is done you can head on over the Widgets page. The plugin adds a Widget area titled ‘After Content‘.
Any widgets that you add to this widget area, will be displayed under your posts or pages, depending on how you’ve configured the plugin.
You can disable the widget on individual posts on a case-by-case basis by simply checking the box on the Widget After Content meta box that is now displayed on the WordPress post editor screen.

You can stop reading if you are satisfied with using a plugin. For the more inquisitive or the more tech-savvy you can still add content after a post or page without using a plugin. We will now show you the two ways as opposed to the plugin method above that you can do that.
Add Content After Posts Using WordPress functions.php
With this method, we will be making use of the built-in WordPress Filter. You can read more about what a WordPress Filter is here. From the reference, you will see that WordPress comes with a long list of filters. In this case, we will be leveraging the the_content filter. This filter is applied to the post or page content retrieved from the database, prior to printing on the screen. It is also used in the trackbacks operation.
You can use the the_content filter to append texts or whatever you want to the content retrieved from the database before printing it out. We do this by using a simple PHP function as shown below.
function custom_insert_after_post( $content ) {

  if ( is_single() ) {

    $content .= 'The block of text will appear after every post or page';

  }

  return $content;

}
add_filter( "the_content", "custom_insert_after_post" );
The code above should be added to the functions.php file in your theme. It is a PHP function that is called wherever the the_content() WordPress function is encountered. It takes the content from the database as the input, appends custom text to it, then returns the modified content as its output.
The above function will be applied on all pages, posts, and even archives, category feeds, etc. You can control where you would want the modified content to appear by adding additional checks. The example below checks if the_content() function is being called within the context of a single post and only then will it apply the custom modified content. If you want it to appear on a page you can change is_single() to is_page().
function custom_insert_after_post( $content ) {

  if ( is_single() ) {

    $content .= 'The block of text will appear after every post but not page or archive feeds';

  }

  return $content;

}
add_filter( "the_content", "custom_insert_after_post" );
Once you have finished editing, save the functions.php file and check out any post on your blog to confirm that update has been applied.
Using Widget in WordPress Template File
This method involves creating a new widget area and placing it at a preferred location after the post content. Even though we are including this method here, it may not be ideal as its placing can be bumped down the pecking order due to plugins invoking the the_content filter and add content above yours.
To proceed with this method here is what you need to do.
First, create a new widget area using the register_sidebar() function in the functions.php file. Here is a reference example.
register_sidebar( array(
    'name'          => __( 'Add Content to Post Widget Area', 'mytheme' ),
    'id'            => 'add-content-sidebar',
    'description'   => __( 'The widget area to add content to the post', 'mytheme' ),
    'before_widget' => '<div class="custom_widget_wrapper">',
    'after_widget'  => '</div>',
    'before_title'  => '<h2 class="custom_widget_title">',
    'after_title'   => '</h2>',
) );
The code above will add a new widget area to the site. The content inserted into this widget area can be managed from the admin dashboard under Appearance > Widgets.
Add this code to the appropriate theme template. In this case, you can add it to either singlular.php (for both posts and pages), page.php (only for pages), or single.php (only for single posts).
if ( is_active_sidebar( 'add-content-sidebar' ) ) :

   dynamic_sidebar( 'add-content-sidebar' );

endif;
You will want to place it in the WordPress loop immediately after the call to the_content(). Depending on the theme layout the location of the loop may differ from theme to theme.
Conclusion
There you have it. You now have the means to automatically add content after posts or pages using a widget created by a plugin or directly in your theme using the functions.php file. We have learned that using a plugin is the easiest and most flexible method while using the native WordPress feature may cause unforeseen problems that you did not intend.
Again using a plugin is the only option above that is theme independent. This means you are not tied to your existing theme for this feature to work.
Found this article interesting? Follow Brightwhiz on Facebook, Twitter, and YouTube to read and watch more content we post.