Before we show you how to install Nginx on Ubuntu 22.04, we need to give you a bit of background. Nginx, created and released by Igor Sysoev back in 2004, is one of the most popular web servers in use today. It is popular for serving high traffic websites due to it being a lightweight alternate to servers like Apache. It is popular as a web server or reverse proxy.
Prerequisites
To succeed with the steps in this tutorial you will ne to have a regular, non-root user with sudo privileges configured on your server. You can find those details on this post on getting started with Ubuntu 22.04.
Step 1 – Install Nginx
Nginx being available in Ubuntu’s default repositories, we will go ahead and use that convenience to to install Nginx using the apt packaging system.
First we need to update our local package index to the most recent package listings, Once done we can then install the Nginx web server. These are the two commands to run.
$ sudo apt update$ sudo apt install nginxStep 2 – Configure the Firewall for Nginx
Before you can this web server, the firewall software needs to be configured to allow access to the Nginx service. Since Nginx registers itself as a service with ufw upon installation, we can take advantage of that to configure the firewall.
Run the command below to list the application configurations that are registered with ufw:
$ sudo ufw app listOutput
Available applications:
Nginx Full
Nginx HTTP
Nginx HTTPS
...As you can see there are three profiles set by Nginx with the following meanings:
- Nginx Full: Opens both port 80 for unencrypted web traffic and port 443 for TLS/SSL encrypted traffic
- Nginx HTTP: Opens only port 80 for unencrypted web traffic
- Nginx HTTPS: Opens only port 443 for TLS/SSL encrypted traffic
Because in this tutorial scope we are not dealing with the installation of SSL certificates we will pick the second option and enable only port 80 for demonstration purposes. Usually with firewalls you want to open the most restrictive profile for your use case.
$ sudo ufw allow 'Nginx HTTP'The check the status using this command:
$ sudo ufw statusYour output will look similar to this:
Output
Status: active

To                         Action      From
--                         ------      ----
OpenSSH                    ALLOW       Anywhere
Nginx HTTP                 ALLOW       Anywhere
OpenSSH (v6)               ALLOW       Anywhere (v6)
Nginx HTTP (v6)            ALLOW       Anywhere (v6)
...
After installation of Nginx service and configuring the firewall, you can run the command below to check and confirm the status of Nginx service.
$ sudo systemctl status nginxOutput
● nginx.service - A high performance web server and a reverse proxy server
Loaded: loaded (/lib/systemd/system/nginx.service; enabled; vendor preset: enabled)
Active: active (running) since Fri 2022-08-01 13:34:55 UTC; 33min ago
Docs: man:nginx(8)
Main PID: 43169 (nginx)
Tasks: 2 (limit: 2289)
Memory: 7.3M
CGroup: /system.slice/nginx.service
├─43169 nginx: master process /usr/sbin/nginx -g daemon on; master_process on;
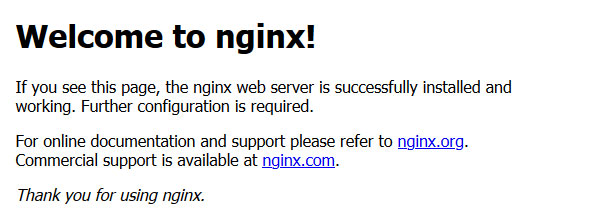
└─43170 nginx: worker processAt this point you can access the default Nginx landing page to confirm that the web server is running properly by navigating to your server’s IP address using your web browser.
http://your_server_ip
Nginx Configuration Reference
The following are the configuration files and directories used by the Nginx web server by default.
- /etc/nginx/nginx.conf: The main configuration file for Nginx server.
- /etc/nginx/conf.d: The directory that contains configuration files for the applications configured with Nginx such as phpMyAdmin etc.
- /etc/nginx/sites-available: Contains all (active and inactive) websites (virtual hosts or server blocks) configuration files.
- /etc/nginx/sites-enabled: Contains active websites configuration files. These are linked to the sites-available directory.
- /etc/nginx/modules-available: Contains all modules configuration files available on server
- /etc/nginx/modules-enabled: Contains activated modules configuration files. These are linked to modules-enabled directory.
Step 4 – Setting Up Nginx Server Blocks or Virtual Hosts (Recommended)
Nginx web server uses server blocks which are similar to what we refer to as virtual hosts in Apache. Theses are used to encapsulate the independent configurations for each unique website or application served by the web server.
Here we will set up a server block for the domain example.com. Be sure to replace this with your own domain name.
By default when you install Nginx on Ubuntu 22.04 you get on server block enabled by default that is configured to serve documents from the /var/www/html directory. We will leave that configuration intact as a fallback. Instead let’s create a directory for example.com.
We will create this structure using the -p flag to create any necessary parent directories:
$ sudo mkdir -p /var/www/example.com/htmlNext, assign ownership of the directory:
$ sudo chown -R $USER:$USER /var/www/example.com/htmlSet up permissions to allow the owner to read, write, and execute the files while granting only read and execute permissions to groups and others, you can input the following command:
$ sudo chmod -R 755 /var/www/example.comCreate a basic index.html page using nano, vi or your favorite editor:
$ nano /var/www/example.com/html/index.htmlAdd the following HTML code into the file:
<html>
    <head>
        <title>Welcome to example.com</title>
    </head>
    <body>
        <h1>Success, example.com is live</h1>
    </body>
</html>
Save and close the file by pressing Ctrl+X to exit, then when prompted to save, Y and then Enter.
Now we need to tell Nginx how to serve the page we just created.
$ sudo nano /etc/nginx/sites-available/example.comserver {
listen 80;
listen [::]:80;
root /var/www/example.com/html;
index index.html index.htm index.nginx-debian.html;
server_name example.com www.example.com;
location / {
try_files $uri $uri/ =404;
}
}Next, we should enable the file by creating a link from it to the sites-enabled directory:
$ sudo ln -s /etc/nginx/sites-available/example.com /etc/nginx/sites-enabled/The link we created above is necessary because Nginx uses symbolic links, or symlinks, to track which of your server blocks are enabled.
Next, open the main configuration file for Nginx server:
$ sudo nano /etc/nginx/nginx.confFind the server_names_hash_bucket_size directive and remove the # symbol to uncomment the line. In nano, you can quickly search for words in the file by pressing CTRL and w.
...
http {
    ...
    server_names_hash_bucket_size 64;
    ...
}
...
Save and close the file when you are finished. We do this to avoid a possible hash bucket memory problem that can arise from adding additional server names.
Next, test to make sure that there are no syntax errors in any of your Nginx files:
$ sudo nginx -tIf there are errors go back and repeat the process and check for any spelling or syntax errors otherwise restart Nginx service.
$ sudo systemctl restart nginxTest your new configuration by navigating to http://example.com. (Remember to substitute example.com with your own domain).
Step 5 – Nginx Service Management
These are some of the basic management commands you will need to know during the lifetime of your server.
To stop Nginx web server, type:
$ sudo systemctl stop nginxTo start the Nginx web server when it is stopped, type:
$ sudo systemctl start nginxTo stop and start the Nginx service in a single step, type:
$ sudo systemctl restart nginxWhen you make changes to the configuration files you can type this command to reload the new configuration changes:
$ sudo systemctl reload nginxTo stop Nginx from automatically starting on system boot then run this command:
$ sudo systemctl disable nginxYou can re-enable the service to start up at boot by typing:
$ sudo systemctl enable nginxConclusion
In this tutorial, you have learned how to install Nginx on ubuntu 22.04, how to allow connections to it through the firewall, and how to set up your first website. There is more that is needed to set up more practical websites and applications including those that access databases, third-party web services, etc.
Found this article interesting? Follow Brightwhiz on Facebook, Twitter, and YouTube to read and watch more content we post.