In this guide, we will learn how to manually set up a POP3/IMAP account specifically in Microsoft Outlook 2016. For those who are using the older Microsoft Outlook 2013, we have prepared a more specific guide showing how to set up POP3/IMAP emails on Microsoft Outlook 2013.
We may now proceed with the directions for manually setting up POP3/IMAP accounts on Microsoft Outlook 2016.
Step 1: Microsoft Outlook 2016 Account Settings
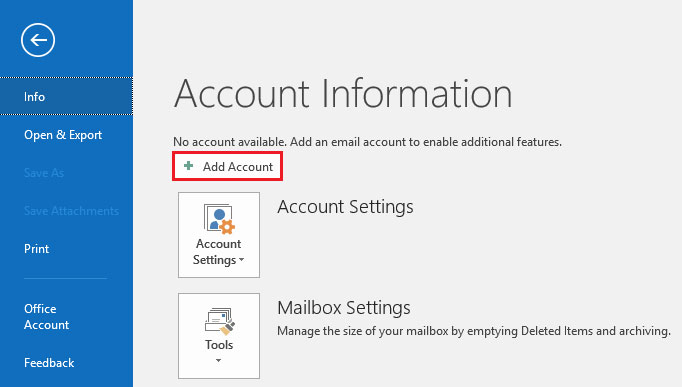
Launch your Microsoft Outlook 2016 email client and click on the File Tab at the top of the application window.
Click Add Account.
Step 2: Select Manual Setup
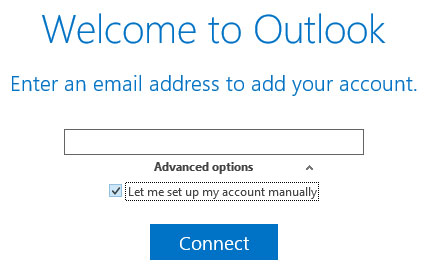
Enter your email address and check the box Let me set up my account manually then click Connect. This will allow you to select the server type in the next step.
Step 3: Select E-mail
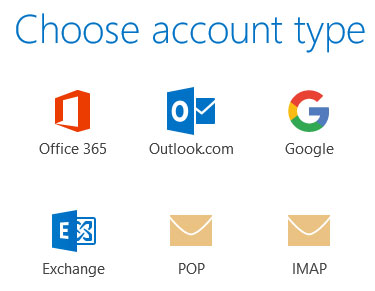
Select the icon for POP or IMAP as provided for by your email service provider. IMAP is the recommended choice if your email service supports both options.
Step 4: Fill in Your Account Settings
Enter your incoming and outgoing servers including the corresponding ports as provided. Next, select SSL/TLS for both servers and check Require logon using Secure Password Authentication (SPA).
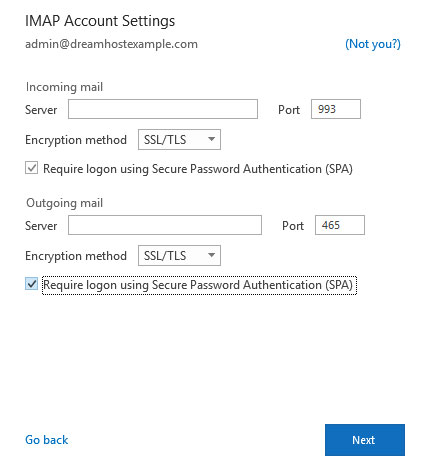
Click Next
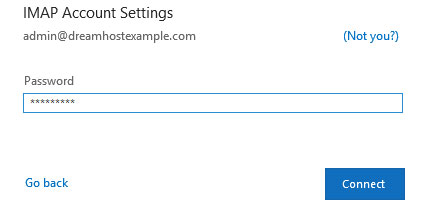
Step 5: Enter Your Password
Type in your password in the field provided and click connect. At this point, you should get the message that your account is successfully added.
For more information on how to purchase and download Microsoft Outlook 2016, you may visit the official website here. For more detailed instructions on how to enter more settings and details, you can check out the Microsoft Office 2013 guide.
The steps are the same when editing an email account allowing you to fine-tune your configuration preferences.
Found this article interesting? Follow Brightwhiz on Facebook, Twitter, and YouTube to read and watch more content we post.