After using Windows 10 for a while especially in a secluded place such as the privacy of your home you might find it increasingly frustrating to always input your password every time the system wakes up from sleep. The good news is you can disable the lock screen in Windows 10 by changing your preferences.
Windows 10 requires you to enter the password every time it wakes up from sleep for very good reasons but mainly it protects your device from unauthorized access is by requiring a password on reentry. Before you disable this feature you may want to carefully evaluate your situation.
Windows 10 offers at least three ways to disable the lock screen after resuming from sleep or hibernation. This Windows 10 guide will reveal the steps to stop your computer from asking you to enter a password when it wakes up from sleep.
Here we will use the Settings app, Group Policy Editor, and Command Prompt.
How to disable lock screen after sleep using the Settings app
- Open Settings
- Click on Accounts
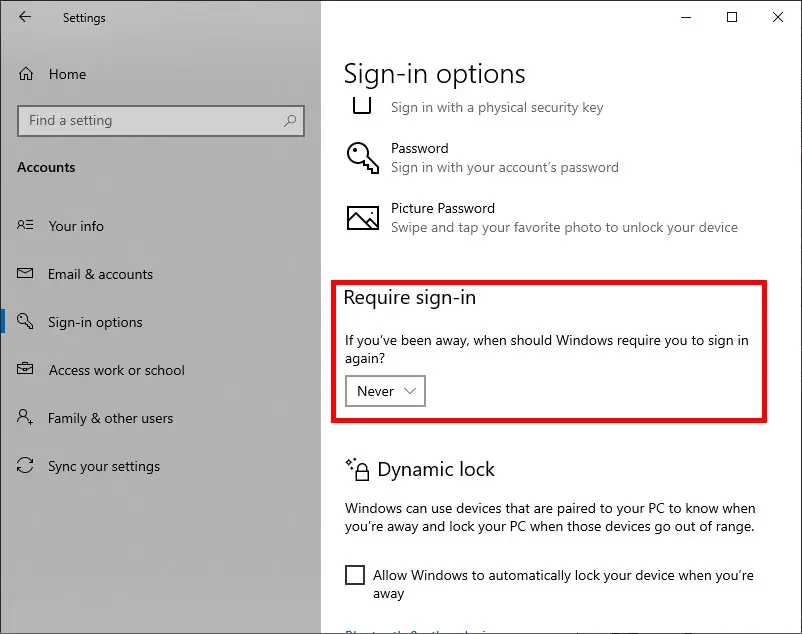
- Click on Sign-in options and scroll down
- Under “Require sign-in,” choose Never from the drop-down menu
Using the Group Policy Feature
Using the Settings app is almost always sufficient to make the change as desired. There may be cases where you might want to customize the behavior but the options are not available from the Settings app.
One example would be for example on a laptop, you may want to choose to stop requiring a password when plugged but not on battery. This is where the Group Policy Editor steps in. Please note that this is available on Windows 10 Pro, Enterprise, and Education.
Use the Windows key + R keyboard shortcut to open the Run command
Type gpedit.msc and click OK to open the Local Group Policy Editor
Head on over to the following path: Computer Configuration > Administrative Templates > System > Power Management > Sleep Settings.
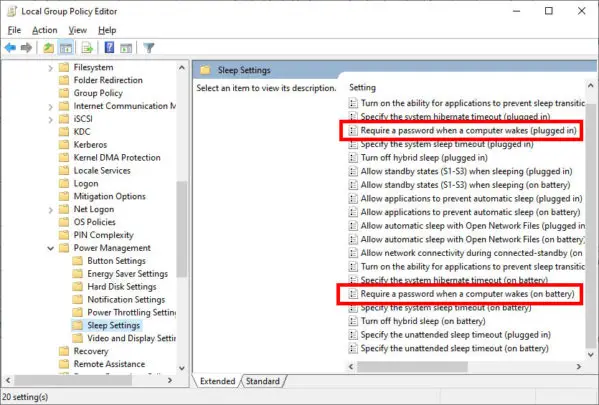
- Double-click the policy you want to enforce which could be either: Require a password when a computer wakes (on battery) or Require a password when a computer wakes (Plugged in).
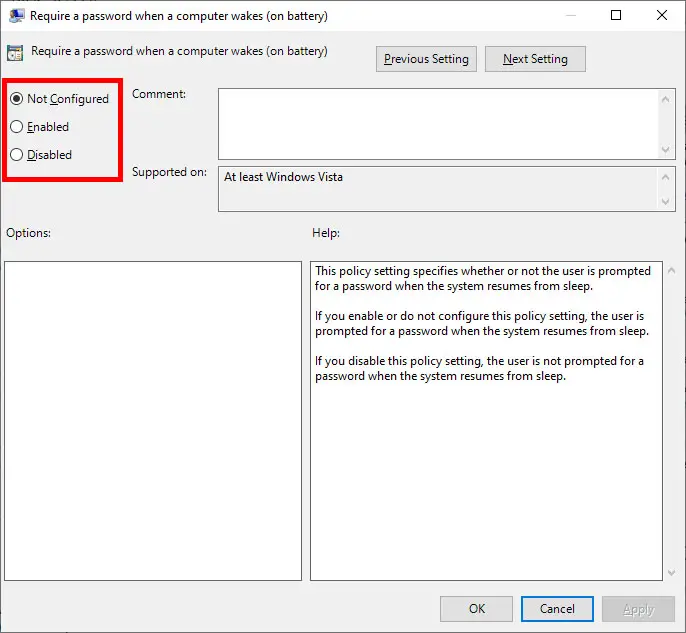
- Check the Disable/Enable option according to your preference in the top-left corner.
- Click Apply.
- Click OK to complete the task.
How to disable sign on after sleep using Command Prompt
This third option is available to those on Windows 10 Home, who don’t have access to the Local Group Policy Editor or for those who want to programmatically set these preferences.
Use the Windows key + X keyboard shortcut to open the Power User menu, and select Command Prompt (admin).
Type the following command and press Enter to disable the lock screen while your device is running on battery:
powercfg /SETDCVALUEINDEX SCHEME_CURRENT SUB_NONE CONSOLELOCK 0Type the following command and press Enter to disable the lock screen while your device is plugged in:
powercfg /SETACVALUEINDEX SCHEME_CURRENT SUB_NONE CONSOLELOCK 0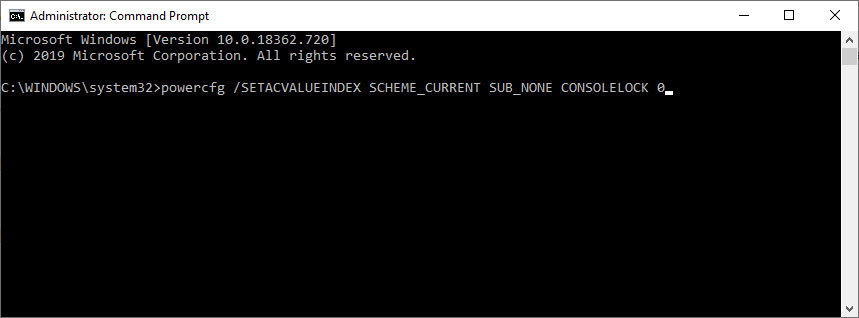
To enable the lock screen option when Windows 10 wakes up, repeat the above steps but do the following instead:
Type the following command and press Enter to enable the lock screen while your device is running on battery:
powercfg /SETDCVALUEINDEX SCHEME_CURRENT SUB_NONE CONSOLELOCK 1Type the following command and press Enter to enable the lock screen while your device is plugged in:
powercfg /SETACVALUEINDEX SCHEME_CURRENT SUB_NONE CONSOLELOCK 1The above options are based on Windows 10. The older versions of Windows use the Control Panel rather than the Settings app to access these features.
Found this article interesting? Follow Brightwhiz on Facebook, Twitter, and YouTube to read and watch more content we post.